We don’t normally do any special decorating for the Thanksgiving holiday at our house. This year, however, my six year old stepson asked me if we could make something for the holiday.
Of course I said okay and asked him if he had anything in particular he wanted to do. He didn’t but said he really wanted to make a colorful turkey.
After some brainstorming, I settled on the idea of using salt dough to make keepsake handprint plaques.
My only setback? I hadn’t used salt dough in a really long time and couldn’t even remember the recipe to make a batch. So, I went straight to the computer to look for a recipe to use for our project.
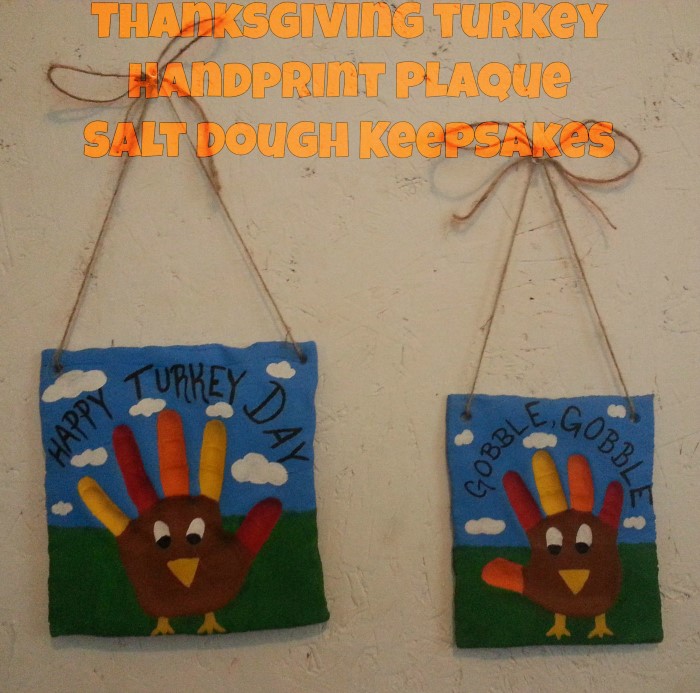
I found an easy-to-follow salt dough ornament recipe over at Mommypotamus and we started our project right away. Below you can see our finished project and learn how to make your own Thanksgiving turkey handprint plaques!
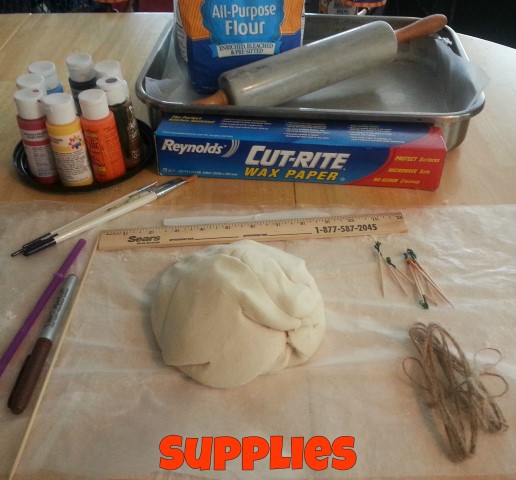
Materials Needed:
- Salt Dough—keep a little extra flour on hand
- Rolling Pin
- Parchment Paper
- Baking Sheet
- Toothpicks (optional)
- Ruler (optional)
- Non-serrated butter knife OR pizza cutter
- Drinking straw
- Spatula
- Acrylic Paints
- Non-toxic acrylic varnish OR other clear sealant
- Paint brushes
- Paint pallet (we used empty coffee can lids for this)
- Fine-tipped Permanent Marker
- Craft twine or ribbon
- Scissors
Project Directions:
1. Prepare Oven and Baking Sheet
Preheat your oven to 250F. Then line a large baking sheet with some parchment paper and set aside for now.
2. Get Salt Dough Ready
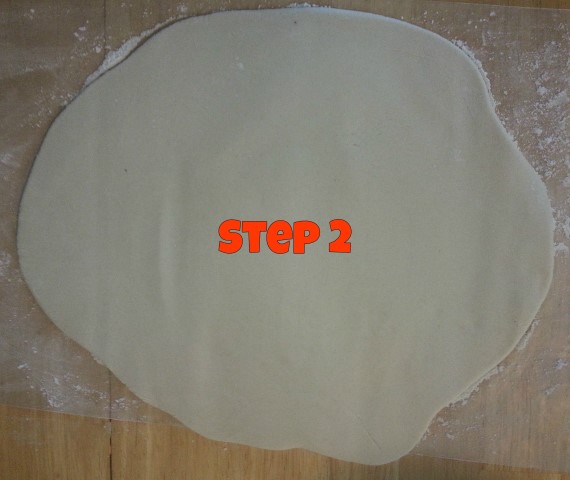
Using your favorite recipe, make a batch (or two) of salt dough. I made one batch for each child’s plaque to ensure we had plenty of dough to work with.
On a lightly floured surface, take your rolling pin (also lightly floured) and roll out salt-dough to 1/4” to 1/2” thickness (see photo above). Keep in mind that thicker dough will take longer to dry completely.
3. Make Handprints
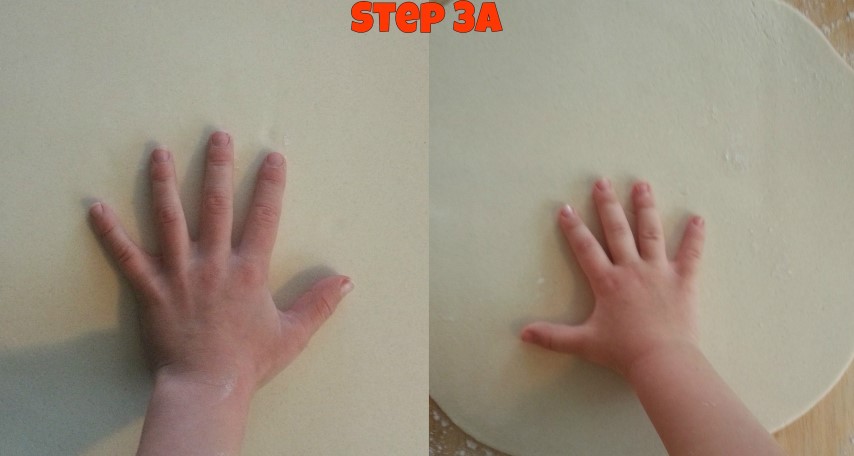
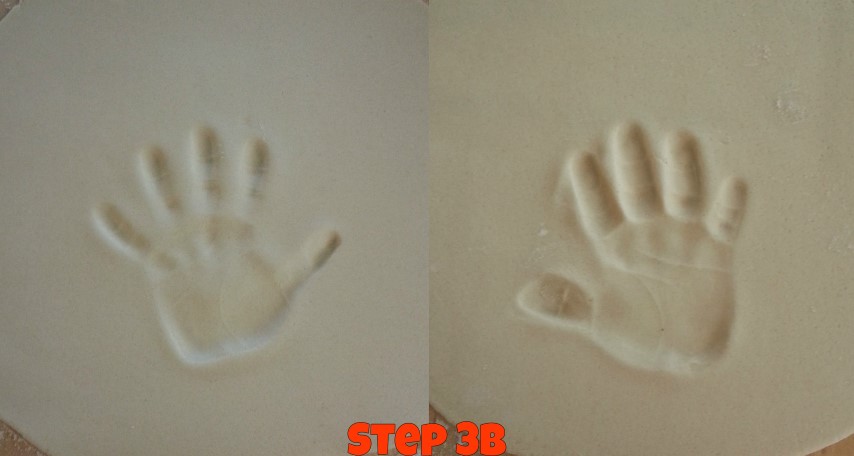
Have your child spread their fingers as wide as they can (like photo 3a). Then have them press their hand into the dough (like photo 3b). Try not to press too hard or the handprint will be extremely thin, which can cause it to crack while drying. Ours were both almost too thin in some places.
4. “Measure” and Cut Out the Plaques

The size of each plaque will vary depending on the size of each child’s handprint. I found that starting underneath the handprint worked best for us. The bottom edge of each plaque is about 1/2” to 3/4” from the bottom of the handprint. We left that much space so that we could paint feet for our turkeys later on. To mark the plaque’s corners, we used toothpicks and a ruler—to ensure they were lined up (see photo 4a).
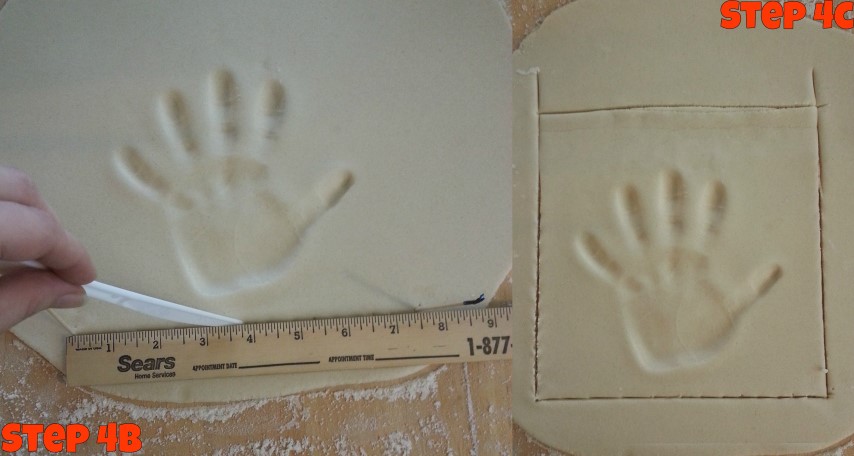
Then we used a butter knife and a ruler to mark the plaque’s edges (photos 4b and 4c above). I recommend using a non-serrated butter knife—a handheld pizza cutter works too—for a smoother cut than ours.
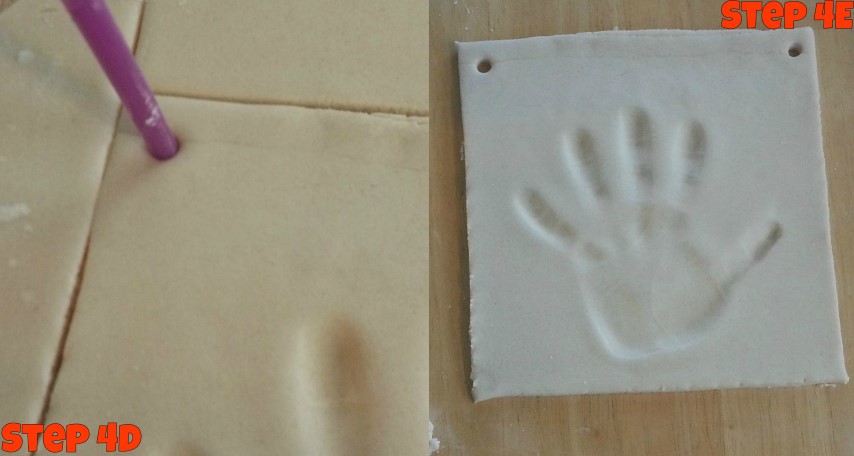
Next, we took the drinking straw and poked holes in the top two corners of each plaque (see photo 4d). We then trimmed away the excess dough (photo 4e) and transfered the plaques from the table to our baking sheet. I found that using a spatula helped make the transfer a little easier to do.
TIP: To store leftover dough, wrap it in some plastic wrap and place it in a labeled ziplock bag in the fridge. If the leftover dough dries out while stored, simply add a little water to it. If it becomes too sticky during storage, add some flour and salt to get it back to the right consistency.
5. Bake Until Dry
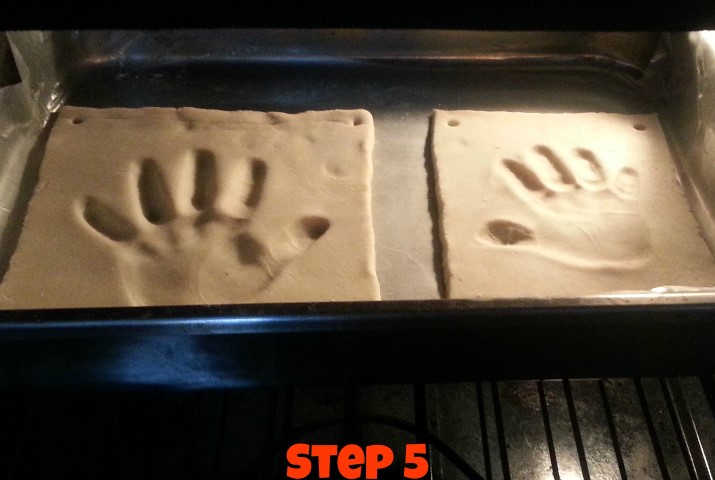
Put the baking sheet in your pre-heated oven and bake the plaques until they are completely dry. Bake time will vary depending on the thickness of your plaques. Our 1/4” thick plaques took roughly 2 1/2 hours to dry. Make sure to check them occasionally and flip them over at least once to avoid browning or burning them. Both of ours browned slightly on the backside because I forgot to flip them!
To see if they are dry enough to take out of the oven simply tap them with your finger. If they have a slightly hollow sound and don’t yield to your finger then they are dry. If not, keep them in the oven a little longer. Once they are dry, remove them from the oven and allow them to cool completely before moving on.
6. Paint the Plaque Backgrounds
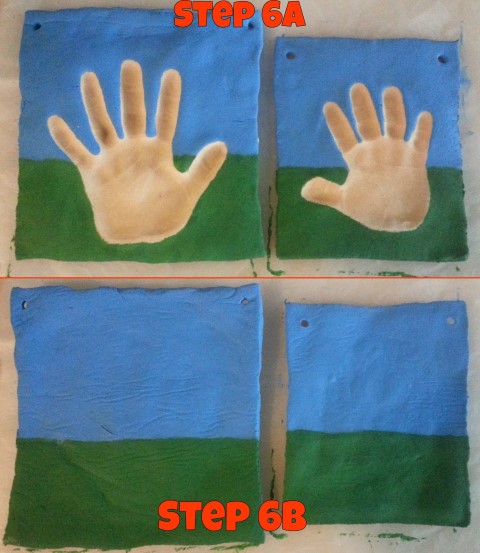
The kids chose blue and green for their backgrounds—blue for a sky and green for some grass. We then painted the front and back of our plaques (excluding the handprints) with our chosen colors (see photos 6a and 6b). Be sure to paint the sides of your plaques and inside each of the holes for a more uniform look.
7. Paint the Handprints

The kids painted their palm prints brown to resemble the body of a turkey (like photo 7a). Then they painted their finger impressions with red, orange, and yellow paints for the turkey’s tail-feathers.
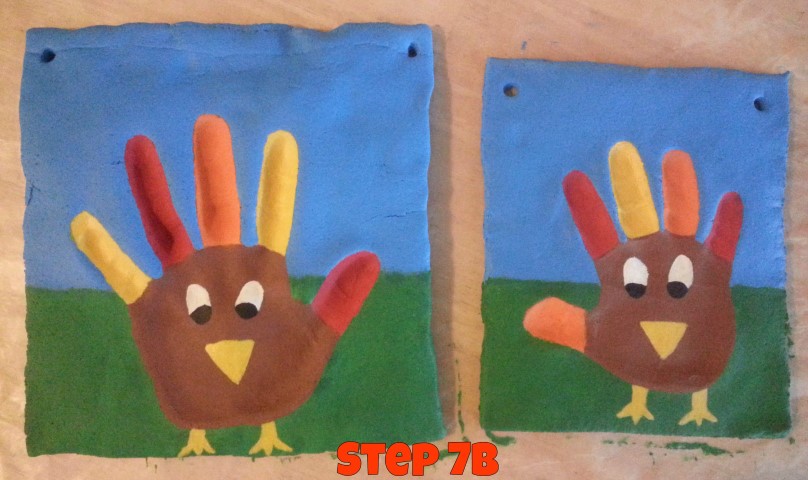
After the palm dried, I added eyes (white and black paint) and a beak (yellow paint) for a face. I also used a little bit of yellow paint to give each turkey a set of feet (see photo 7b).
8. Write a Thanksgiving Phrase

At this point, you can either leave your plaques just as they are or you can add fun Thanksgiving phrases to them. We chose to add the phrases “Happy Turkey Day” and “Gobble, Gobble” above our turkeys (photo 8a). If you choose to write a phrase, you can use either a fine-tipped permanent marker or paint in you choice of color.
After we finished writing our phrases, my stepson insisted the sky needed clouds. So we used a little white paint to add some (see photo 8b). You can do this now too, if you would like.
9. Label Each Plaque
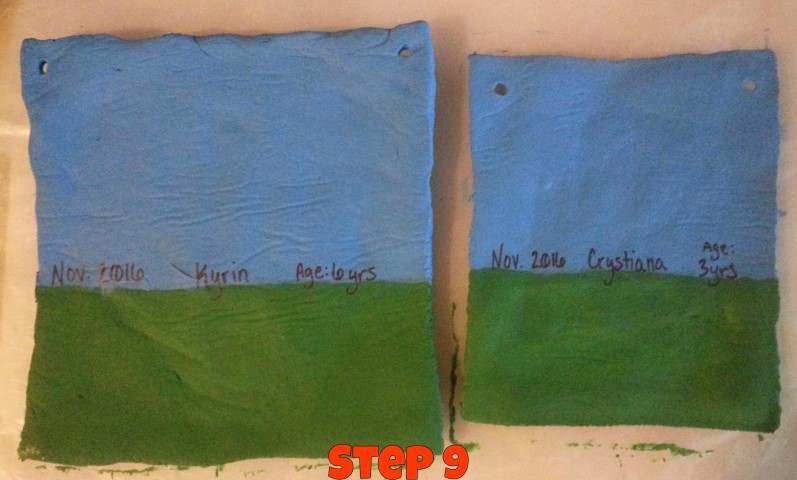
Make sure the paint on the front of each plaque is completely dry before moving on to this next step. Once they are, flip them over and use a fine-tipped permanent marker to write your children’s names and ages. Also be sure to include the date (or simply the year) that the plaques were made!
10. Seal Each Plaque
At this point, you should seal the plaques with a non-toxic acrylic varnish or other clear sealant of your choice. This is to help prevent the growth of mold to ensure that your plaques last for many years to come. Make sure the sealant is completely dry before moving on.
11. Add Twine and Hang
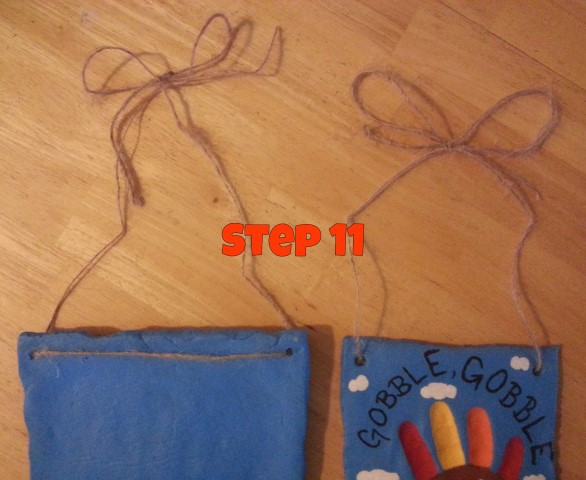
Thread twine through the holes at the top of the plaque and tie it in a bow (see photo above). Hang and enjoy or give them away as cute keepsake gifts!
Overall, this was a fabulous way to spend a rainy weekend day. These Thanksgiving turkey handprint plaques turned out super cute and the kids had a blast making them. Plus, they are terrific little keepsakes that we will be sure to put up every year from here on out!