Halloween is easily my favorite holiday to decorate for and each year I try to add at least one new spooky decoration to my collection. Every now and again, however, that means I have to make said decorations myself (for a variety of reasons).
I don’t mind though. Most of the time, I’m more pleased with the homemade decorations than I am with the cutesy store bought ones anyhow.
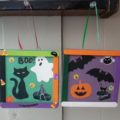
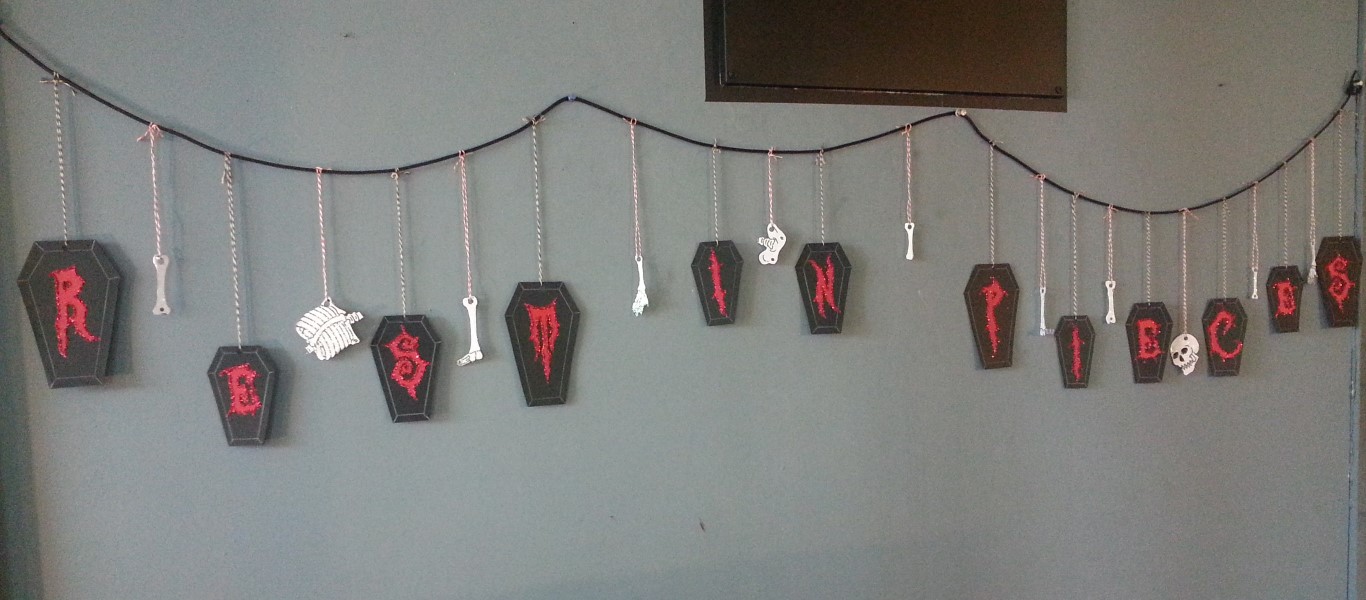
This year I made myself a new Halloween banner to hang on my dining room wall. I decided to do this simply because I wanted the pieces to be coffin-shaped and I couldn’t find anything close to what I was after in the stores.
I loved the end result so much and have received so many compliments on it that I decided to share how to make it!
Supplies
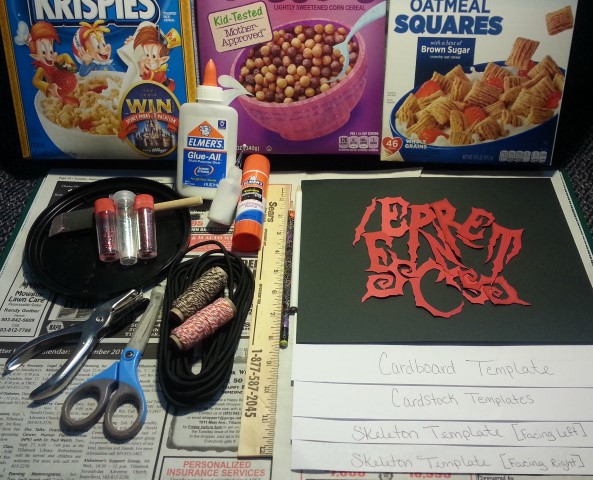
- Newspaper (to cover your work area)
- Several Empty Cereal Boxes
- Coffin-Shaped Cardboard and Cardstock Templates
- “Rest in Pieces” Letters Template
- Skeleton Pieces Templates (optional)
- Black Cardstock Paper
- Red Cardstock Paper
- White Cardstock (optional)
- Scissors
- Pencil
- Glue Stick
- Single hole punch
- Ruler
- White Colored Pencil
- Liquid Glue
- I used a small fine-tipped bottle of liquid glue (seen in the photos), but a normal bottle of liquid school glue will work just fine
- Sponge Paint Brush (optional)
- Red Glitter
- White/Clear Glitter (optional)
- Sturdy string for hanging (twine, yarn, ribbon, etc.)
Directions
1. Prepare Your Cereal Boxes
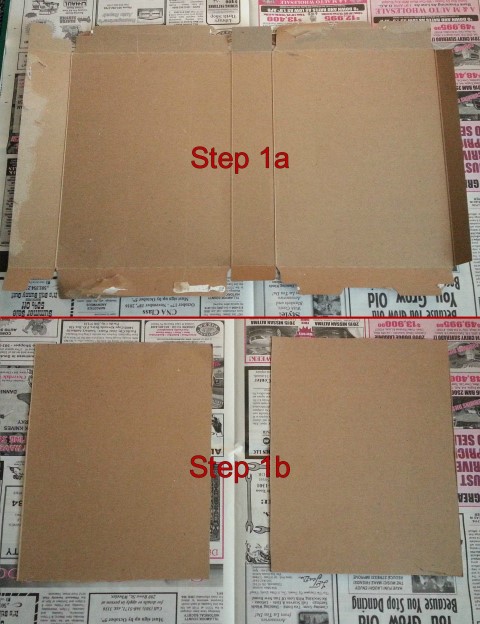
Once you have covered your work area with newspaper, take one of the empty cardboard cereal boxes and spread it out completely flat (as shown in photo “1a”). Trim off the flaps and throw them away (see photo “1b”). Repeat these steps for all of your empty cereal boxes before moving on.
2. Print and Cut the Templates
If you haven’t done so already, take a few minutes to print and cut out the templates for the coffins and spooky phrase. If you would also like to add them to your banner, go ahead and do the same for the skeleton templates that are included.
I’ve labeled each of the coffin templates with the words “cardboard coffin” or “cardstock coffin” so that you know you are using the correct templates for each part of the next step.
This is important to note because the cardboard templates are actually slightly smaller than the cardstock ones, despite the fact that they pretty much look the same. The cardboard coffins need to be slightly smaller than the cardstock ones or else the cardboard will visibly stick out around the edges of your finished coffins.
3. Create Your Coffin Tag Pieces
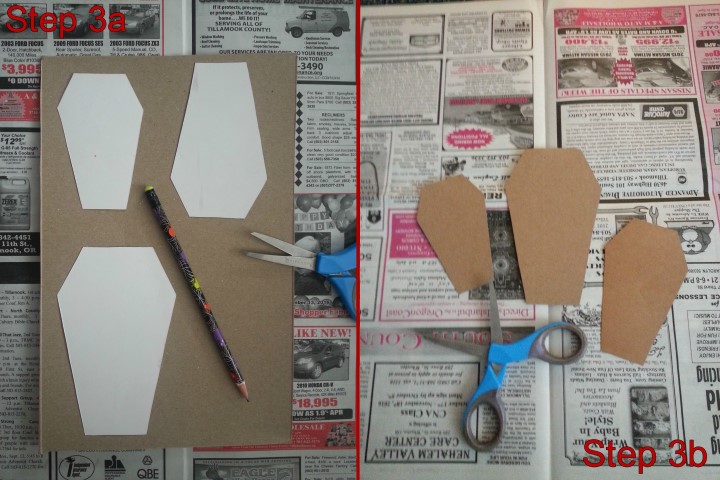
Trace coffins onto the cardboard using the correct templates and a pencil (see photo “3a”). You will need one coffin for each letter of your spooky Halloween phrase—for this project I made twelve banner tags. After you have drawn enough coffins, cut them out and set them aside for now (as shown in photo “3b”).
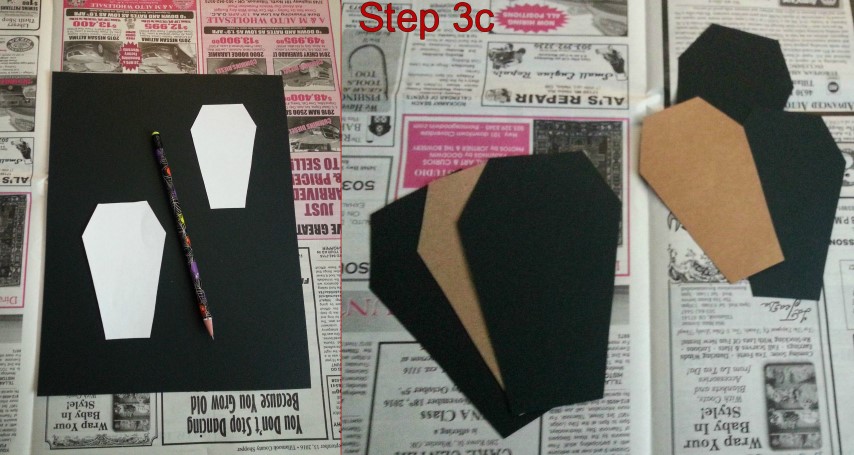
Next you need to use the black cardstock paper and the appropriate templates to trace and cut out enough pieces for the front and back of each cardboard coffin you just made (photo “3c” above).
4. Add Detail To The Cardstock Coffins
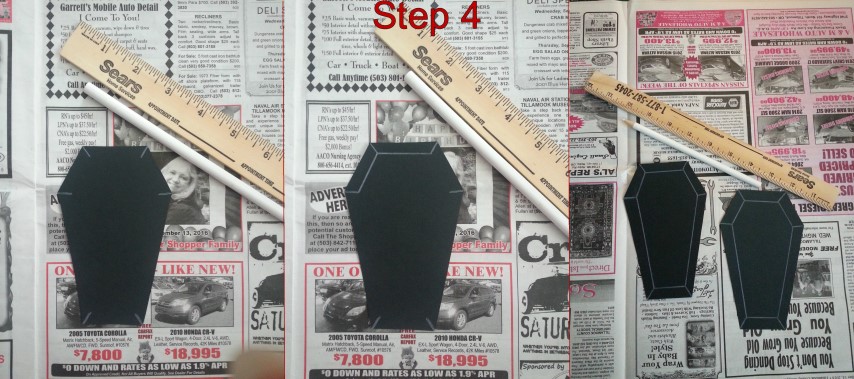
With the white colored pencil and a ruler, draw lines onto one side of your cardstock coffin-shapes approximately a quarter of an inch long in each pointed corner as well as the same length in from each edge (as shown in photo “Step 4”). This will help give the tags more of a 3-D coffin look.
5. Assemble The Coffin Tag Pieces
Next, you need to take your single-hole puncher and put a hole in each coffin shape about half an inch from the top edge. Trust me, this is much easier to do now rather than after the pieces are glued together.
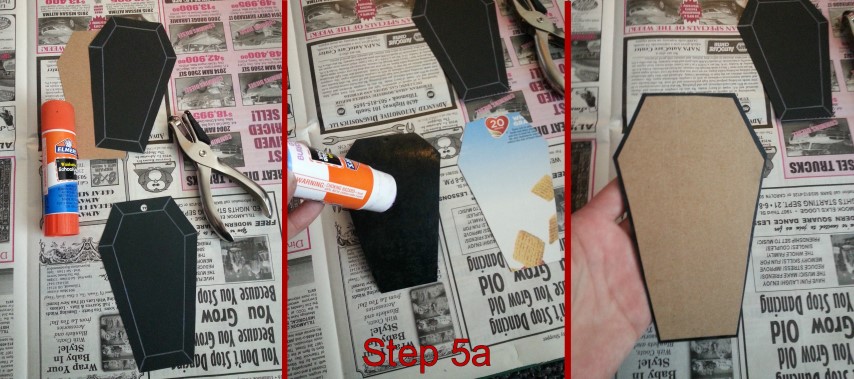
To ensure that your holes line up properly, punch a hole in one of the black cardstock cutouts first and glue it onto one of the appropraite sized cardboard shapes (see photo “5a”). Press firmly for at least thirty seconds to make sure the glue sets properly before moving on.

Then, punch a hole into the cardboard using the hole in the cardstock as a guide (photo “5b” above).
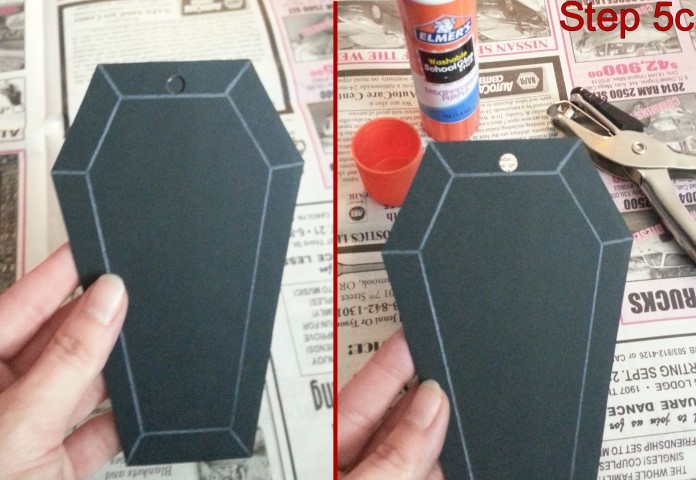
Repeat these steps for the second piece of cardstock that goes on the other side of the cardboard shape (as shown in photo “5c”). Do this for all of the remaining coffin shapes.
6. Spell Out Your Phrase
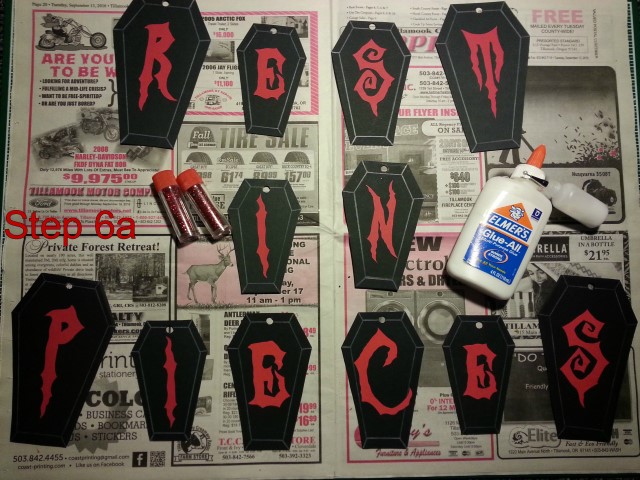
Now your coffins are ready to be decorated with your Halloween phrase. For this step, I found a spooky looking font I liked and printed the phrase “Rest in Pieces” onto red cardstock—which I’ve included for you! Just cut out the letters (if you didn’t do that in step two) and use a glue stick to attach them to your coffin tags (like photo “6a”).
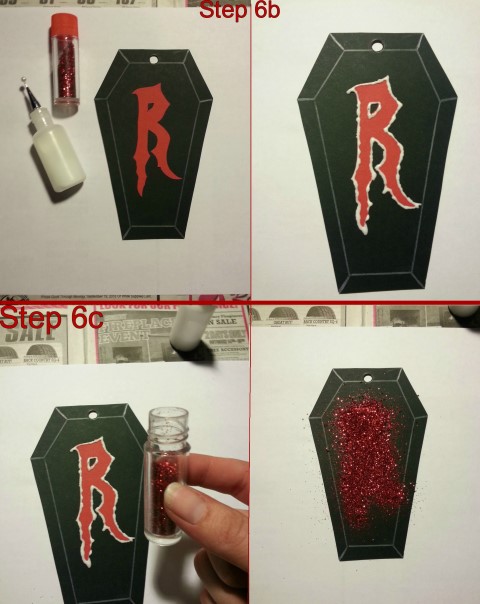
Next, use a little liquid glue to outline each of your spooky letters (see photo “6b”) and then sprinkle some red glitter on the glue (like photo “6c”).
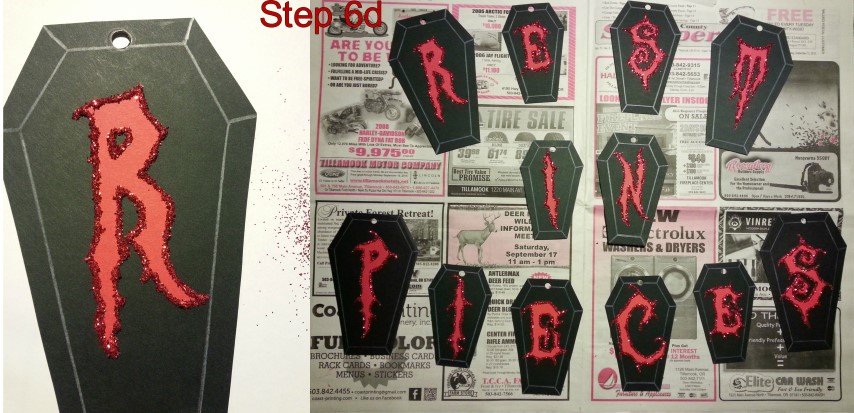
Carefully shake the excess glitter onto a clean sheet of paper so that it can be saved for later use (photo “6d” above).
Set your coffins aside for now and let them dry completely.
7. Add A Few More Spooky Details
This next part is purely optional. I wanted a little something extra to go along with my spooky phrase so I added some skeleton pieces to my banner.
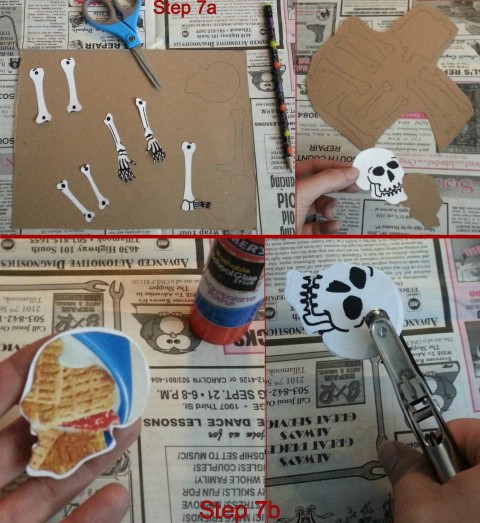
I printed a skeleton template onto some white cardstock and simply repeated steps one through five (as shown in photos “7a” and “7b”). Keep in mind that your cardboard pieces must be slightly smaller than your cardstock pieces, so they may need to be trimmed some before you can glue the pieces together.
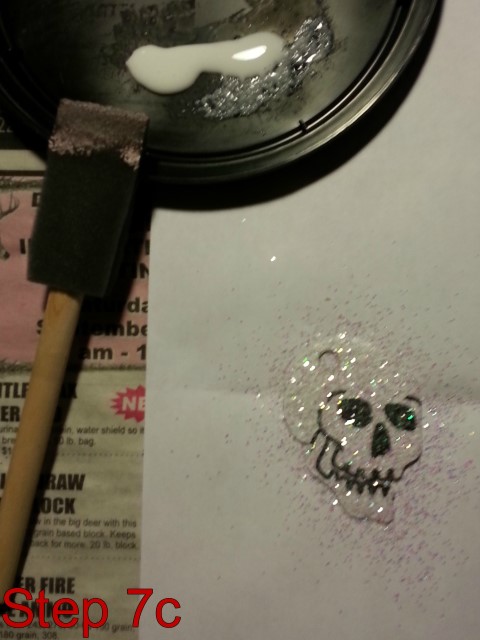
I also decided that I wanted my skeleton pieces to have a bit of sparkle to them. So I just dabbed a little bit of clear liquid glue onto each piece with a sponge paint brush and then sprinkled on some clear glitter (photo “7c” above). If you do the same, make sure your glue is completely dry before moving onto the last steps.
8. Get Your Main Line Ready
By now all of your banner pieces should be dry and ready to hang. Lay them all out and decide how you would like for them to be spaced apart while hanging—this step is important because it will determine the length of your banner’s main line. It will also help determine the length of the string needed for each of the hanging banner pieces.
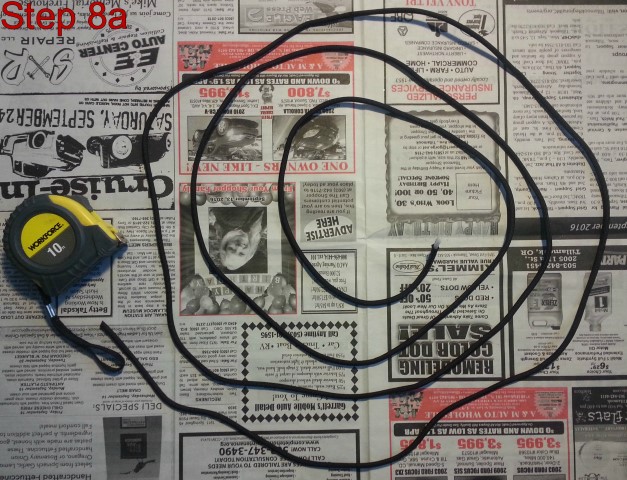
Measure and cut a length of sturdy string long enough to be able to hang all of your banner pieces from it (see photo “8a”). My piece ended up close to eight and a half feet long. Depending on how you want yours to look, or where you want to hang it up at, you may need more or less string than I used.
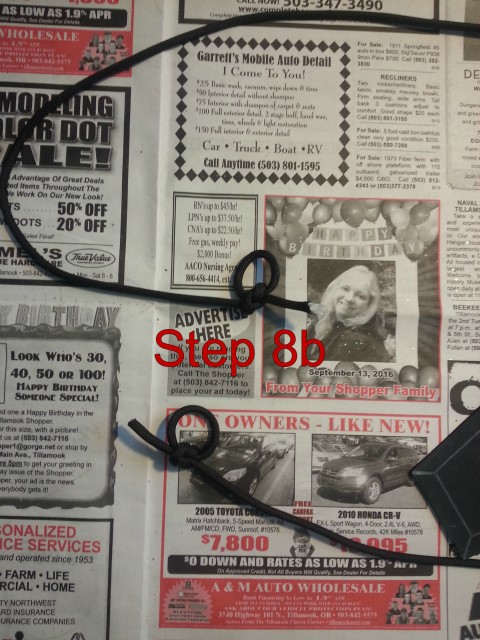
Tie a loop into either end of this main line so that you can hang your banner once it is completely assembled (shown in photo “8b”).
9. Attach Your Banner Pieces
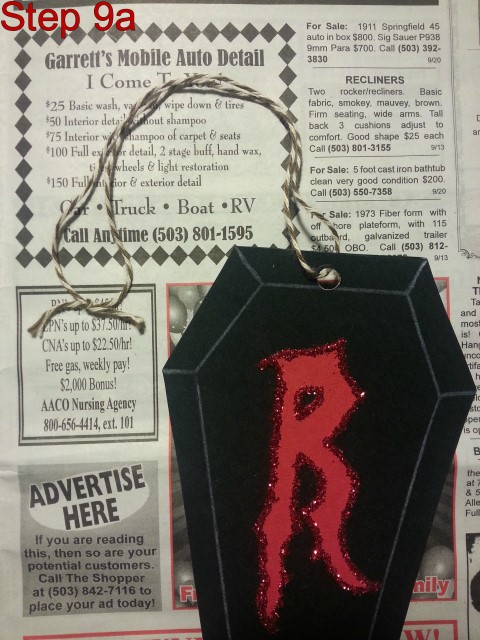
The length of twine I used for each banner piece varied depending on how far from the main line I wanted it to hang. After I cut the length I needed for a banner piece, I looped the twine through the hole I had previously punched in it and tied a small knot in the end (photo “9a” above).
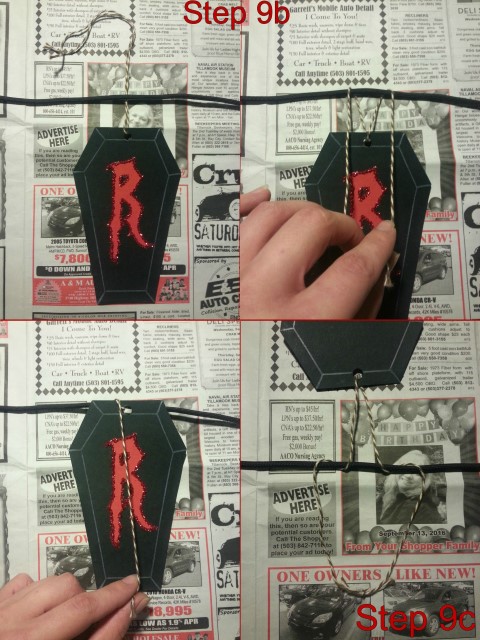
Next, I looped the string for the banner piece over the main line (see photo “9b”) and passed the piece through its own looped string (shown in photo “9c”).
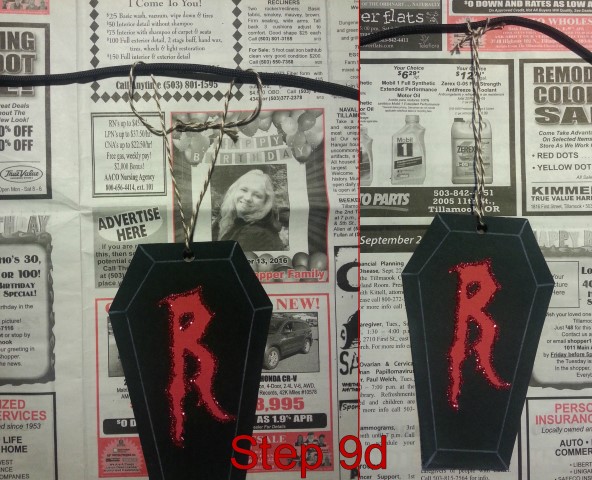
Then, I gently pulled down on the piece to secure it to the main line by closing the loop (as shown in photo “9d”). This is a great technique to use because it makes it easy for you to space the pieces to your liking while they hang from the main line and it allows for much easier storage.
Repeat these steps for each banner piece. Once you have attached all of your banner pieces to the main line you are ready to hang it up anywhere you like!*
The one thing I love the most about this Halloween banner project is that it can easily be adapted for ANY Halloween shapes and phrases you can possibly think of.
So, go ahead and make one of these spooky coffin-shaped Halloween banners for yourself. Once you do, I’m sure you’ll want to make several more in varying themes—I know I certainly want to!
*Please note that if you do not hang this banner flat against a wall, the pieces WILL rotate and that may make it difficult to read the spooky phrase. To counter this dilemma, you could simply repeat step six to add letters to the reverse side of each coffin. I actually plan on doing this sometime in the future so that I can hang this up in my bay window next year!
Like this…?